
How to Frame a Canvas Painting: A Pro Guide
Master the art of framing your canvas paintings, enhancing their aesthetic appeal and ensuring their longevity.
Frame Your Art NowKey Takeaways
- ✓ Framing enhances artwork aesthetics and protection.
- ✓ Different frame types suit various canvas styles.
- ✓ Accurate measurements are crucial for a perfect fit.
- ✓ DIY framing offers cost savings and personalization.
How It Works
Decide between traditional, floating, or tray frames based on your artwork and desired aesthetic. Consider the depth and style that best complements your piece.
Precisely measure the width, height, and depth of your stretched canvas. These dimensions are critical for selecting or building a frame that fits perfectly without gaps or pressure.
Ensure both your canvas and chosen frame are clean and free of dust or debris. If building a frame, assemble it carefully, checking for squareness and stability.
Carefully place the canvas into the frame, ensuring it is centered and flush. Use appropriate hardware like offset clips or screws to securely fasten the canvas to the frame, preventing movement.
Understanding Canvas Framing Options
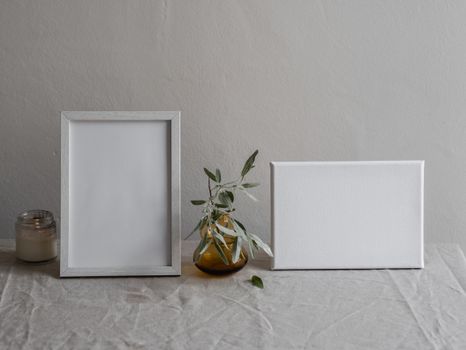 Photo: Polina ⠀ / Pexels
Historically, canvas paintings were often framed in elaborate, ornate designs that complemented the grandiosity of the artwork itself. These traditional frames typically feature a rabbet, a recessed lip on the inner edge, into which the stretched canvas sits. The canvas is then secured from the back, often with small nails, brads, or offset clips, creating a seamless transition from the artwork to the frame. Traditional frames come in an immense variety of profiles, finishes, and materials, from simple wooden fillets to intricately carved and gilded masterpieces. They are particularly well-suited for classic, realistic, or heavily textured oil and acrylic paintings, providing a sense of gravitas and enclosure. When selecting a traditional frame, consider the era and style of your painting, as well as the overall decor of where it will be displayed. A heavy, dark frame might overwhelm a delicate watercolor on canvas, while a minimalist light wood frame might feel out of place with a baroque-inspired piece. The key is balance and harmony.
In contrast, floating frames, also known as 'tray frames' or 'floater frames,' have gained immense popularity in contemporary art circles. These frames are designed to create a visual gap between the edge of the canvas and the inner edge of the frame, giving the illusion that the artwork is 'floating' within the frame. This modern approach is especially effective for paintings that extend to the edges of the canvas, known as 'gallery-wrapped' canvases, where the artist intends for the sides to be part of the artwork. The floating effect highlights the entirety of the painting, including its depth, and prevents any part of the image from being obscured by a traditional frame's rabbet. Floating frames are typically made from wood or metal and come in various finishes, from natural wood to painted blacks, whites, or metallics. They are ideal for abstract art, modern landscapes, or any piece where a clean, uncluttered presentation is desired. When choosing a floating frame, pay close attention to the gap size; a small gap might look too tight, while a very large gap could feel disconnected. The standard gap is usually around 1/4 inch to 1/2 inch, providing a subtle yet distinct separation. For a deeper dive into choosing art, consider exploring resources on how to choose art for your home. This will help you select pieces that will look stunning in any frame you choose.
Beyond these two main categories, there are also variations like 'L-frames' which are a simpler version of a floating frame, or custom-built frames designed to accommodate unique canvas shapes or depths. Some artists also opt for a 'gallery wrap' presentation without any frame at all, relying on the finished edges of the canvas to serve as its own frame. However, even gallery-wrapped canvases can benefit from a floating frame for added protection and a more finished look. Ultimately, the best frame choice is one that not only protects your artwork but also enhances its visual impact, speaking to the aesthetic of the piece and your personal taste. Consider the colors within your painting, the texture, the subject matter, and the overall mood you wish to convey. A thoughtful selection will ensure your framed canvas painting becomes a focal point and a cherished part of your space.
Essential Tools and Materials for DIY Framing
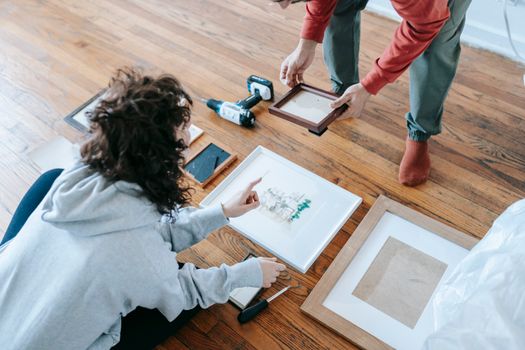 Photo: Blue Bird / Pexels
First and foremost, you'll need the frame itself. As discussed, this could be a pre-made traditional frame, a floating frame kit, or raw lumber if you're building from scratch. If purchasing a pre-made frame, ensure it's specifically designed for canvas paintings, meaning it has the appropriate rabbet depth or floating mechanism. For those opting to build their own frame, select high-quality wood such as poplar, pine, or oak. The type of wood will influence the frame's appearance, weight, and durability. You'll also need appropriate wood glue for joining the frame pieces securely, and potentially wood filler if you need to address any small gaps or imperfections.
Measuring tools are absolutely critical for precise framing. A good quality tape measure is indispensable for determining the exact dimensions of your canvas and ensuring your frame pieces are cut to size. A carpenter's square or combination square is essential for checking that all corners are perfectly at 90 degrees, preventing a skewed or lopsided frame. For cutting wood, a miter saw is highly recommended for accurate, clean angle cuts, especially if you're building a traditional frame with mitered corners. If a miter saw isn't accessible, a miter box and hand saw can work, though it requires more precision and effort. For floating frames, where the frame pieces often butt together rather than miter, a simple crosscut saw might suffice, but accuracy remains paramount.
Securing the canvas within the frame requires specific hardware. Offset clips (also known as Z-clips or G-clips) are widely used for traditional frames. These small metal clips screw into the back of the frame and hook over the stretcher bar of the canvas, holding it firmly in place. For floating frames, screws are typically driven through the back of the frame into the stretcher bars of the canvas. You'll need a drill with appropriate drill bits for pre-drilling pilot holes to prevent wood splitting, and a screwdriver or power drill for driving screws. Small brad nails or a brad nailer can also be useful for securing frame corners during assembly, especially if you're not using clamps.
Other useful accessories include clamps, particularly corner clamps or band clamps, which are invaluable for holding frame pieces together while glue dries, ensuring strong and square joints. Sandpaper (various grits from medium to fine) is necessary for smoothing rough edges and preparing the frame for finishing. If you plan to paint or stain your frame, you'll need brushes, paint, stain, and a protective sealant or varnish. Finally, a clean, flat work surface is crucial for a smooth framing process, along with protective gear like safety glasses and gloves, especially when cutting wood or handling chemicals. Having all these tools and materials organized and ready will make your DIY framing project a much more enjoyable and successful endeavor.
Step-by-Step Guide to Framing a Stretched Canvas
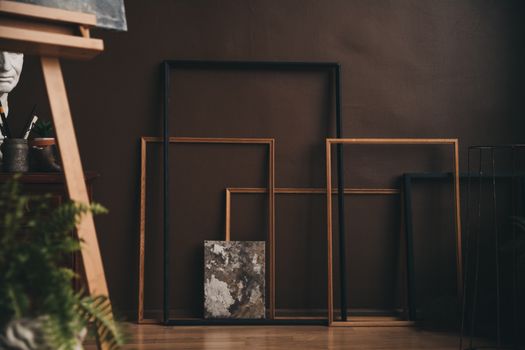 Photo: Lisett Kruusimäe / Pexels
The first and most critical step is accurate measurement. Using a reliable tape measure, carefully determine the width, height, and depth of your stretched canvas. For traditional frames, you'll need the exact outer dimensions of your canvas. For floating frames, you'll need the outer dimensions plus an allowance for the desired gap (e.g., 1/4 inch on each side). The canvas depth (the thickness of the stretcher bars) is crucial for both types of frames to ensure the rabbet or floating mechanism accommodates it properly. Measure multiple points along each side to account for any slight inconsistencies in the canvas or stretcher bars. Write these measurements down clearly.
Once you have your measurements, it's time to prepare or select your frame. If you're purchasing a pre-made frame, ensure its internal dimensions match your canvas's outer dimensions (for traditional frames) or provide the desired float space (for floating frames). If you're building a frame from raw lumber, use your measurements to accurately cut the frame pieces. For traditional frames, this typically involves cutting four pieces with 45-degree mitered ends. For floating frames, the construction might involve straight butt joints, with an inner lip to support the canvas. Use a miter saw for precise cuts. After cutting, dry-fit the frame pieces to ensure they form a perfect rectangle or square and that all joints meet snugly. Sand any rough edges with medium-grit sandpaper.
Next, assemble the frame. Apply wood glue to the mitered or butt joints. For traditional frames, join the corners, securing them with clamps, a band clamp, or corner clamps. Ensure the frame remains square as the glue dries. You can use small brad nails or V-nails with a brad nailer for added strength, though glue is the primary bonding agent. For floating frames, assemble the outer frame first, then attach the inner lip or ledger strips that the canvas will rest on, ensuring the correct float gap. Allow the glue to dry completely according to the manufacturer's instructions, which can take several hours. Once dry, remove clamps and give the frame a final sanding with fine-grit sandpaper to achieve a smooth finish, ready for painting or staining if desired. Apply your chosen finish, allowing it to cure fully before proceeding.
Now, it's time to mount the canvas. Carefully place your finished canvas into the prepared frame. For traditional frames, the canvas will sit directly into the rabbet. For floating frames, center the canvas within the frame, ensuring an even gap around all sides. Use spacers if necessary to maintain the gap during this step. Once properly positioned, secure the canvas to the frame. For traditional frames, use offset clips. Place them along the back edge, screwing one end into the frame and the other end over the stretcher bar of the canvas. Typically, two clips per side are sufficient for smaller canvases, with more for larger pieces. For floating frames, carefully drill pilot holes through the back of the frame into the stretcher bars of the canvas, then secure with screws. Ensure the screws are not too long to avoid piercing the front of the canvas. Finally, attach any hanging hardware to the back of the frame, ensuring it's centered and appropriate for the weight of your framed artwork. For more tips on displaying your art, including hanging techniques, check out our guide on how to hang art.
Advanced Framing Techniques and Common Mistakes to Avoid
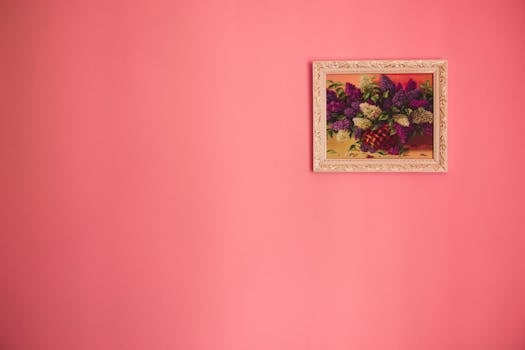 Photo: Romka / Pexels
One advanced technique involves creating a 'linen liner' or 'fillet' for traditional frames. A linen liner is a fabric-covered wooden insert that sits between the canvas and the main frame, providing a visual break and adding a touch of elegance, particularly to oil paintings. Fillets are smaller decorative strips, often gilded, that can be added to the inner edge of a frame to enhance its richness. These elements require precise cutting and fitting to integrate seamlessly with both the canvas and the outer frame. Another technique for larger canvases is incorporating corner keys or wedges into the stretcher bars themselves. These small wooden pieces are tapped into the mitered corners of the stretcher bars after the canvas is stretched, allowing for minor adjustments to the canvas tension over time, preventing sagging.
For artists who paint on thin panels or unstretched canvas, mounting it to a rigid substrate before framing is crucial. This typically involves using archival adhesive to mount the artwork onto a acid-free foam core or hardboard, providing stability and preventing warping. This mounted piece can then be framed like a traditional canvas. When working with extremely valuable or fragile paintings, consider hiring a professional conservator or framer who specializes in archival techniques. They can offer insights into museum-quality framing, including UV-protective glazing (though less common for canvas, sometimes used in shadow box presentations) and specialized mounting methods that ensure longevity.
Common mistakes often stem from a lack of precision or rushing the process. The most frequent error is inaccurate measurement. A frame that is even slightly off can result in unsightly gaps, a canvas that doesn't fit, or a skewed appearance. Always measure at least twice, and dry-fit all components before final assembly. Another mistake is using the wrong type of hardware or insufficient fasteners. Forgetting pilot holes when screwing into wood can lead to splitting, and using too few offset clips can cause the canvas to shift over time. Always ensure the canvas is securely fastened to prevent it from falling out or becoming damaged.
Failure to allow glue to fully cure is another common error. Rushing to the next step before the glue has completely set can compromise the strength of the frame joints, leading to instability. Similarly, not properly preparing the frame surface before painting or staining can result in an uneven or peeling finish. Neglecting to clean both the canvas and the frame before assembly can trap dust or debris, which becomes permanently visible once framed. Lastly, choosing a frame that clashes with the artwork or the intended display environment is a significant aesthetic mistake. Always consider the painting's style, colors, and the room's decor when making your selection. By being meticulous and mindful of these potential pitfalls, you can ensure your framed canvas painting looks professional and stands the test of time.
Comparison
| Feature | Floating Frame | Traditional Frame | Gallery Wrap (Unframed) |
|---|---|---|---|
| Aesthetic | Modern, 'floating' look | Classic, enclosed look | Minimalist, raw edge |
| Canvas Visibility | Full canvas edge visible | Edges partially covered by rabbet | Full canvas edge visible |
| Protection | Good side and corner protection | Excellent all-around protection | Minimal protection, vulnerable edges |
| Best For | Contemporary, abstract art | Classic, traditional art | Modern, large-scale pieces |
| Cost (DIY) | Moderate | Moderate to High | Low |
| Installation Difficulty | Moderate | Moderate | Easy (no installation) |
| Enhances Depth | ✓ | ✗ | ✗ |
What Readers Say
"This guide completely transformed how I approach framing my acrylic paintings. The step-by-step instructions for floating frames were incredibly clear, and my art now looks so professional on display!"
Sarah J. · Austin, TX"I used to pay a fortune for custom framing. Following this article, I successfully framed three large oil canvases myself. The tips on choosing the right frame type were invaluable."
Mark D. · Seattle, WA"I was hesitant to try DIY framing, but this article made it so approachable. My abstract piece now has a beautiful floating frame that perfectly complements its modern style, saving me over $300."
Emily R. · Miami, FL"The information on tools and materials was spot-on. While I still found cutting the mitered corners a bit challenging, the overall guidance led to a much better result than I expected for my landscape painting."
David L. · Denver, CO"As a gallery owner, I often advise artists on presentation. This article covers all the essentials and even some advanced techniques that I'd recommend to anyone looking to enhance their canvas art."
Olivia P. · Chicago, ILFrequently Asked Questions
What's the main difference between a traditional frame and a floating frame for canvas paintings?
A traditional frame typically covers a small portion of the canvas's edge with its rabbet, creating a classic, enclosed look. A floating frame, on the other hand, creates a visible gap between the canvas and the frame, giving the illusion that the artwork is 'floating' within it, highlighting the full canvas and its depth, ideal for gallery-wrapped pieces.
Is it difficult to frame a canvas painting myself?
Framing a canvas painting yourself is a rewarding project that can be achieved with patience and precision. While it requires careful measurement and assembly, especially for cutting wood, the process is manageable for most DIY enthusiasts. Following a detailed guide and using the right tools significantly reduces the difficulty.
How do I choose the right frame size for my canvas?
To choose the right frame size, accurately measure the width, height, and depth of your stretched canvas. For a traditional frame, the inner dimensions of the frame should match the outer dimensions of your canvas. For a floating frame, add the desired 'float' gap (e.g., 1/4" on each side) to your canvas dimensions to determine the frame's internal space.
Is DIY canvas framing cheaper than professional framing?
Generally, yes. DIY canvas framing can be significantly cheaper than professional custom framing, especially for multiple pieces. The cost savings come from purchasing materials and pre-made frames yourself, rather than paying for professional labor and custom-cut services. However, investing in quality tools might be an initial expense.
Can I frame a canvas painting without glass?
Yes, canvas paintings are typically framed without glass. Unlike works on paper, canvas paintings (especially oil and acrylic) are usually varnished, providing sufficient protection from dust and UV light. Glass can create reflections and, in some cases, can affect the painting's breathability or trap moisture, which is generally not recommended for canvas.
Who should consider framing their own canvas paintings?
Artists, art collectors, and anyone with a stretched canvas painting they wish to display beautifully and protect should consider framing it. DIY framing is particularly appealing to those on a budget, those who enjoy hands-on projects, or individuals who want complete creative control over their artwork's presentation.
Are there any safety concerns when framing a canvas painting?
Yes, safety is important. When cutting wood for a frame, always use safety glasses and ensure your work area is clear. Be careful with sharp tools like saws and screwdrivers. If using power tools, follow manufacturer guidelines. Ensure proper ventilation if using paints, stains, or adhesives with strong fumes.
What's the future trend for canvas framing?
Future trends in canvas framing lean towards sustainability, with a growing demand for frames made from recycled or ethically sourced materials. Minimalism and versatility continue to be popular, with floating frames maintaining their appeal. Technology might also play a role, with smart frames offering integrated lighting or digital display options.
Elevate your artwork and protect your investment by learning how to frame a canvas painting with confidence. This comprehensive guide provides all the knowledge and steps you need to achieve professional results, transforming your cherished pieces into gallery-worthy displays. Start your framing project today and showcase your art beautifully.