A Pro's Guide: How to Clean Oil Paintings at Home Safely
how to clean oil paintings at home

A Pro's Guide: How to Clean Oil Paintings at Home Safely

Unlock the secrets to safely cleaning your treasured oil paintings and bringing back their original luster without damage.

Start Cleaning Safely

Key Takeaways

  • ✓ Always test cleaning solutions on an inconspicuous area first.
  • ✓ Dust regularly with a soft, natural-bristle brush.
  • ✓ Avoid water or harsh chemical cleaners, especially on unvarnished paintings.
  • ✓ Professional restoration is recommended for significant damage or valuable pieces.

How It Works

1
Assess the Painting's Condition

Before any cleaning, carefully examine your oil painting for cracks, flaking paint, or unvarnished areas. This initial assessment will dictate the safest cleaning approach.

2
Gentle Dust Removal

Begin with the gentlest method: dry dusting. Use a very soft, natural-bristle brush or a lint-free microfiber cloth to carefully remove surface dust without applying pressure.

3
Spot Cleaning (If Necessary)

For stubborn dirt or grime, prepare a mild, pH-neutral cleaning solution and apply it sparingly with a cotton swab. Work in small sections, changing swabs frequently to avoid spreading dirt.

4
Final Inspection and Drying

After cleaning, gently blot any remaining moisture with a clean, dry, lint-free cloth. Allow the painting to air dry completely in a dust-free environment before rehanging or storing.

Understanding Your Oil Painting: A Foundation for Safe Cleaning

Modern abstract painting featuring textured brush strokes in brown and red hues. 
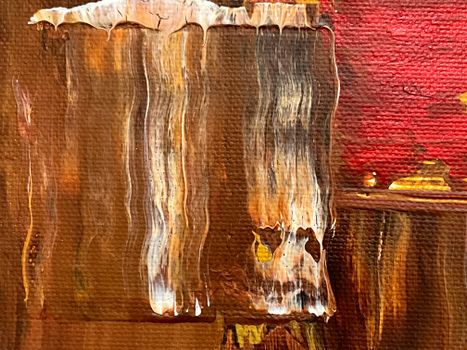
Photo: Steve A Johnson / Pexels
Before you even consider touching your cherished artwork with a cleaning implement, it's paramount to understand what an oil painting is, how it's constructed, and what makes it vulnerable. Oil paintings are complex, multi-layered objects, each layer contributing to the artwork's longevity and susceptibility to damage. Typically, an oil painting begins with a support, often canvas or wood panel, which is then primed with gesso to create a stable, non-absorbent surface. On this primer, the artist applies layers of oil paint, a mixture of pigment and a drying oil (like linseed, walnut, or poppy oil). These layers can take months or even years to fully cure, and even then, they remain somewhat flexible and sensitive. Finally, many oil paintings are protected by a varnish layer, which serves multiple purposes: it unifies the painting's sheen, saturates colors, and most importantly, provides a sacrificial barrier against environmental pollutants, dust, and UV light. The age of your painting is a critical factor. Older paintings, especially those from the 19th century or earlier, may have brittle paint layers, delicate varnishes that have yellowed or become fragile, or even historical repairs that could be compromised by improper cleaning. Modern oil paintings, while more robust in some ways, can still be vulnerable if the paint layers are not fully cured or if the artist used non-traditional materials. Understanding the specific characteristics of your painting – its age, the type of varnish (if any), and any visible signs of deterioration like cracking (craquelure) or flaking paint – is the first, most crucial step in determining a safe cleaning strategy. Any sign of instability, such as loose paint chips or significant cracks, immediately signals that professional intervention is necessary. Attempting to clean such a painting yourself risks irreversible damage, potentially devaluing or destroying the artwork. This initial assessment is not just about identifying dirt; it's about evaluating the structural integrity of the artwork itself. Always prioritize preservation over aggressive cleaning. If in doubt, err on the side of caution and consult an expert. Ignoring these initial warning signs is a common mistake that can lead to catastrophic results. A painting's history is embedded in its layers, and respecting that history means approaching its care with informed reverence. For more general art care tips, consider exploring how to care for various art mediums to broaden your understanding of art preservation.

Essential Tools and Techniques for Dry Cleaning Oil Paintings

Pink powder swirls around a makeup brush against a dark background, showcasing elegance and beauty. 
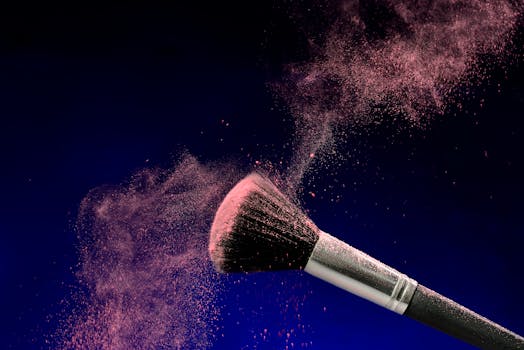
Photo: Viễn Đông / Pexels
The safest and most frequently recommended method for cleaning oil paintings at home begins with dry cleaning. This process focuses on removing superficial dust and loose debris without introducing any moisture or chemical solvents, which can be highly detrimental to oil paint and varnish layers. The tools required are minimal but specific, chosen for their gentleness and effectiveness. First and foremost, you will need a very soft, natural-bristle brush. A high-quality sable watercolor brush, a large cosmetic brush (like a blush brush, ensuring it's clean and unused for makeup), or a dedicated artist's soft dusting brush are ideal choices. The key is that the bristles must be extremely fine and flexible, designed to pick up dust without scratching the surface or dislodging paint. Avoid synthetic brushes, as their bristles can be too stiff or abrasive. Alternatively, a clean, lint-free microfiber cloth can be used for larger, less intricate areas, but caution is still advised. When dry dusting, technique is paramount. Hold the brush at a shallow angle to the painting's surface, almost parallel, and use very light, feathery strokes. Do not press down onto the canvas. The goal is to gently sweep the dust away, not scrub it off. Work systematically across the painting, starting from the top and moving downwards, allowing gravity to assist in dust removal. For textured areas or impasto, be extra careful, guiding the brush lightly over the raised paint without snagging. If using a microfiber cloth, gently wipe in one direction, lifting the cloth after each pass rather than dragging it back and forth, which can redistribute dust. For particularly stubborn dust that seems to cling, you can try using a very soft, clean, lint-free cotton ball or a makeup sponge (again, unused) with the same gentle, dabbing motion. Never use household dusting sprays or furniture polish; these contain chemicals that can react negatively with oil paint and varnish, leaving behind residues that attract more dirt or even cause permanent discoloration. Regular dry dusting, perhaps once every few months or as needed, is the best preventative measure to keep your oil paintings looking their best and to minimize the need for more intensive cleaning down the line. This gentle, consistent approach preserves the integrity of the artwork without introducing unnecessary risks.

When to Consider Wet Cleaning: Solutions and Precautions

Close-up of an artist painting abstract art with vivid colors on a canvas. 
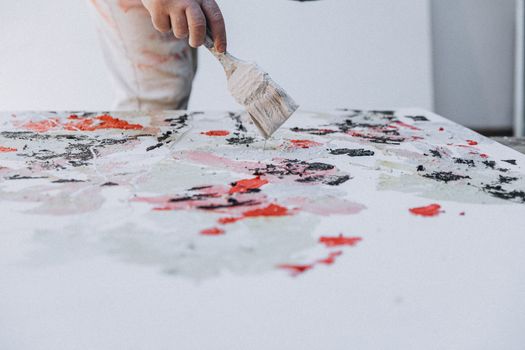
Photo: Alina Rossoshanska / Pexels
Wet cleaning an oil painting is a significantly more advanced and risky procedure than dry dusting, and it should only be considered if dry methods prove insufficient for removing surface grime, fingerprints, or light stains. It is absolutely crucial to reiterate: never attempt wet cleaning on an unvarnished oil painting, a painting with flaking or unstable paint, or one that shows any signs of damage. Water and solvents can be absorbed directly into the paint layers of an unvarnished piece, causing swelling, discoloration, or even complete paint loss. For varnished paintings, the goal of wet cleaning is to clean the varnish layer itself, not the paint beneath it. The varnish acts as a protective barrier, allowing for a more forgiving cleaning process, but even then, extreme caution is necessary. The most common and generally safest solution for light wet cleaning is distilled water, sometimes with a tiny drop of pH-neutral, non-ionic detergent (like Orvus WA Paste, often used by conservators, or a very dilute mild dish soap without dyes or perfumes). A commonly suggested home remedy is a mixture of distilled water and saliva, as human saliva contains enzymes that can break down certain types of grime without harming oil paint or varnish, due to its neutral pH. However, saliva application requires a very specific technique and sterile environment to prevent introducing bacteria. For general purposes, a highly diluted solution of distilled water and a neutral detergent is often preferred. The application method is critical: use clean, lint-free cotton swabs, slightly dampened – not wet – with your chosen solution. Work in small, inconspicuous areas first (such as a dark edge or corner of the painting) to test for any adverse reactions, like paint lifting, color bleeding, or cloudiness. Apply the solution with a gentle rolling motion, never scrubbing. Change cotton swabs frequently as they pick up dirt to avoid spreading grime back onto the painting. Immediately follow with a fresh cotton swab dampened with only distilled water to rinse the area, removing any detergent residue. Finally, gently blot dry with a clean, dry cotton swab or a soft, lint-free cloth. Work in very small sections (e.g., a square inch at a time), allowing each area to dry completely before moving to the next. Never allow moisture to pool on the surface. If at any point you observe paint coming off on the swab, discoloration, or any other negative reaction, stop immediately and consult a professional conservator. Remember, the goal is gentle cleaning, not restoration; significant grime or yellowed varnish requires the expertise of a trained conservator who can safely remove and reapply varnish without harming the underlying artwork. For deeper insights into art preservation, consider resources on advanced art conservation techniques.

Common Mistakes to Avoid & Advanced Care Tips for Oil Paintings

Female artist in workshop with classical marble busts, examining sketches. Photo: KATRIN BOLOVTSOVA / Pexels
Cleaning an oil painting at home, while possible for superficial dust and light grime, is fraught with potential pitfalls. Awareness of common mistakes can save your artwork from irreversible damage. The most frequent error is using inappropriate cleaning agents. Never use household cleaners, glass cleaner, furniture polish, alcohol, turpentine, or any harsh chemical solvents. These substances are designed for different surfaces and can dissolve varnish, strip paint, cause discoloration, or leave behind damaging residues. Another critical mistake is using abrasive materials. Sponges with scouring pads, rough cloths, or even stiff brushes can scratch delicate paint layers or abrade the varnish. Excessive pressure during cleaning, whether dry or wet, is also highly damaging, potentially dislodging paint chips or weakening the canvas. Ignoring the painting's condition is another major oversight. Cleaning a painting with active flaking, deep cracks, or areas of loose paint will only exacerbate the problem. Similarly, attempting to clean an unvarnished painting with any liquid is a recipe for disaster. Lack of proper testing is also a common pitfall; always test your chosen method on a tiny, inconspicuous area first. Lastly, attempting to remove yellowed varnish yourself is a professional task. Varnish removal requires specialized solvents and techniques that, if improperly applied, can dissolve the paint layers beneath. Beyond cleaning, proactive care is essential for the longevity of your oil paintings. Here are some advanced care tips: * **Environmental Control:** Maintain a stable environment with consistent temperature (around 68-72°F) and relative humidity (45-55%). Fluctuations cause the canvas and paint layers to expand and contract, leading to cracking. * **UV Protection:** Avoid hanging oil paintings in direct sunlight or under strong artificial lights that emit UV radiation. UV light can fade pigments and degrade varnish over time. Consider UV-filtering glass for framed pieces or specialized museum lighting. * **Proper Handling:** Always handle paintings by their frame or stretcher bars, never by the canvas surface. Wear clean cotton gloves to prevent transferring oils from your skin. * **Framing and Backing:** Ensure paintings are properly framed, ideally with a backing board to protect the canvas from dust, punctures, and environmental changes from behind. * **Storage:** If storing paintings, do so in a stable environment, upright, and protected from dust and physical damage. Avoid attics, basements, or garages where temperature and humidity fluctuate wildly. * **Regular Inspection:** Periodically inspect your paintings for any signs of damage, pest activity, or changes in condition. Early detection can prevent minor issues from becoming major problems. If you notice any significant issues, such as mold, insect damage, or widespread paint loss, it's time to call a professional conservator. Their expertise is invaluable for preserving the artistic and monetary value of your collection.

Comparison

Cleaning MethodBest ForRisk LevelRequired Skill
Dry Dusting (Soft Brush)Surface dust, regular maintenanceVery LowBeginner
Dry Dusting (Microfiber Cloth)Light surface dust on smooth areasLowBeginner
Distilled Water + Cotton SwabLight grime on varnished paintingsMediumIntermediate (with caution)
Distilled Water + Mild DetergentStubborn grime on robustly varnished paintingsMedium-HighIntermediate (test rigorously)
Varnish Removal/Heavy CleaningYellowed varnish, deep-seated grime, significant repairsVery HighProfessional Conservator Only

What Readers Say

"This guide on how to clean oil paintings at home was incredibly thorough. I used the dry dusting method on my grandmother's old portrait, and the difference is remarkable. The instructions were clear, emphasizing safety first, which I really appreciated."

Eleanor Vance · Boston, MA

"I was hesitant to touch my antique landscape painting, but this article gave me the confidence to try the gentle wet cleaning with distilled water. My painting now looks so much brighter, and I followed all the precautions, preventing any damage."

Marcus Chen · San Francisco, CA

"After reading this, I successfully cleaned a grimy oil painting I found at a flea market. The colors popped more, and it looks like a completely different piece. The step-by-step approach made it easy to understand and execute."

Sarah Jenkins · Austin, TX

"The information provided is excellent, especially the warnings about what not to do. I managed to clean a small area of my painting, but for the larger, more delicate sections, I'll definitely be calling a professional as advised."

David O'Connell · Chicago, IL

"As an artist myself, I sometimes find my older pieces accumulate dust. This guide on how to clean oil paintings at home was a fantastic refresher and provided new insights into safe, gentle cleaning techniques for my own work."

Lena Petrova · Miami, FL

Frequently Asked Questions

What is the absolute safest way to clean an oil painting at home?

The safest method is always dry dusting. Use a very soft, natural-bristle brush (like a clean makeup brush or a fine artist's brush) to gently sweep away surface dust. Avoid any pressure and work in light, feathery strokes. This minimizes the risk of damaging paint layers or varnish.

Can I use water to clean my oil painting?

Only use distilled water, and only on paintings that are fully varnished and stable. Never use tap water due to minerals and impurities. Even with distilled water, apply it sparingly with a slightly damp cotton swab, testing first in an inconspicuous area, and immediately blot dry. Never use water on unvarnished paintings.

How do I remove stubborn grime or fingerprints from an oil painting?

For stubborn grime or fingerprints on a varnished painting, you can try a very dilute solution of distilled water with a tiny amount of pH-neutral, non-ionic detergent (like Orvus WA Paste). Apply with a slightly damp cotton swab, rinse immediately with a distilled water swab, and blot dry. Always test first and proceed with extreme caution.

Is it expensive to have an oil painting professionally cleaned?

Professional oil painting cleaning costs can vary significantly based on the size of the painting, the extent of the damage or grime, and the conservator's expertise. While it can be an investment, it's often worthwhile for valuable or sentimental pieces, as professionals have specialized tools and knowledge to ensure safe and effective restoration, preserving the artwork's value.

What's the difference between cleaning and restoring an oil painting?

Cleaning generally refers to removing surface dirt and grime. Restoration, on the other hand, is a more intensive process that can involve repairing tears, consolidating flaking paint, removing old yellowed varnish, inpainting lost areas, and reapplying a fresh varnish. Restoration is always a job for a trained professional conservator.

Who should attempt to clean oil paintings at home?

Only individuals who are willing to proceed with extreme caution, have thoroughly researched the process, and are confident in their ability to follow precise, gentle techniques should attempt to clean oil paintings at home. It's best suited for superficial dust or very light grime on stable, varnished pieces. Anyone with doubts should consult a professional.

Are there any risks associated with cleaning oil paintings at home?

Yes, significant risks exist. Improper cleaning can lead to paint loss, discoloration, abrasion of the surface, damage to the varnish layer, or even irreversible chemical reactions. Using the wrong products or techniques can permanently devalue or destroy the artwork. Always prioritize caution and professional consultation for anything beyond light dusting.

Will cleaning an oil painting at home increase its value?

Safely removing surface dust and light grime can certainly improve a painting's appearance, making its colors more vibrant and revealing details obscured by dirt, which can indirectly enhance its perceived value. However, attempting complex cleaning or restoration without professional expertise can severely decrease a painting's value due to irreversible damage. Professional cleaning and restoration, when done correctly, often do increase or preserve a painting's value.

Armed with this comprehensive guide, you now possess the knowledge to approach how to clean oil paintings at home with confidence and care. Remember, patience and a gentle touch are your most valuable tools. Preserve the beauty and legacy of your artwork for generations to come.

Topics: how to clean oil paintings at homeoil painting restorationsafely clean artdusting oil paintingsvarnish cleaning oil painting
Leo List
Brampton weed
Adultwork