How to Clean Oil Paintings at Home Safely & Effectively
how to clean oil paintings at home

How to Clean Oil Paintings at Home Safely & Effectively

Discover professional techniques and essential tips to preserve the beauty and longevity of your treasured oil artworks.

Start Cleaning Today

Key Takeaways

  • ✓ Always test cleaning solutions on a small, inconspicuous area first.
  • ✓ Avoid harsh chemicals or abrasive materials, which can damage paint layers.
  • ✓ Routine dusting is crucial for preventing dirt buildup.
  • ✓ Professional restoration is recommended for extensive damage or valuable pieces.

How It Works

1
Assess the Painting's Condition

Before starting, carefully examine your oil painting for flaking paint, cracks, or other damage. This assessment helps determine the appropriate cleaning approach and identifies areas requiring extra caution.

2
Gather Your Gentle Supplies

Assemble soft brushes, cotton swabs, distilled water, and a mild, pH-neutral cleaning agent if necessary. Ensure all materials are clean and free of residues to prevent further contamination.

3
Perform a Patch Test

Apply your chosen cleaning method to a tiny, hidden section of the painting, like an edge or a dark corner. Wait several minutes to observe any adverse reactions before proceeding to the main surface.

4
Clean Methodically and Gently

Work in small sections, using light, circular motions and changing your cleaning material frequently. Avoid saturation and allow each area to dry before moving on, ensuring a uniform and safe cleaning process.

Understanding the Vulnerability of Oil Paintings to Dirt and Grime
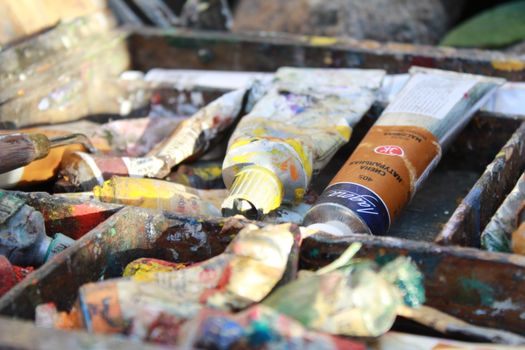
A close-up view of colorful paint tubes in an artist's box, perfect for creative projects. Photo: Юга Семенова / Pexels
Oil paintings, renowned for their rich textures and vibrant colors, are also incredibly delicate and susceptible to environmental damage over time. Understanding why they get dirty and the specific threats dirt poses is the first crucial step in learning how to clean oil paintings at home effectively and safely. The surface of an oil painting, often protected by a layer of varnish, is not impervious to the accumulation of airborne pollutants, dust, smoke, and even microscopic particles from household activities. Over years, these layers of grime can significantly dull the painting's colors, obscure details, and diminish its overall aesthetic appeal. Dust, for instance, is not just an aesthetic issue; it can be abrasive, and when combined with moisture, it can create a grimy film that bonds more strongly to the painting's surface. Smoke from fireplaces, candles, or cigarettes contains oily residues that adhere tenaciously to varnish, forming a yellowish or brownish film that is particularly challenging to remove without professional intervention. Furthermore, environmental factors like humidity fluctuations can cause the canvas and paint layers to expand and contract, potentially leading to cracks, flaking paint, and further ingress of dirt into these compromised areas. Even seemingly benign elements like cooking fumes can deposit a sticky layer on a painting, trapping dust and accelerating its deterioration. The varnish layer, while offering protection, can also yellow and darken with age, further contributing to the painting's obscured appearance. This natural aging process of varnish, combined with accumulated surface dirt, can dramatically alter the artist's original intent, making colors appear muted and contrasts less stark. Recognizing these vulnerabilities is paramount. It emphasizes the need for a gentle, informed approach to cleaning, one that respects the integrity of the artwork while effectively addressing the accumulated impurities. Improper cleaning methods can irreversibly damage the paint layers, remove original glazes, or even strip away the varnish entirely, exposing the delicate paint to further harm. Therefore, before embarking on any cleaning endeavor, it's essential to appreciate the delicate balance between removing grime and preserving the historical and artistic value of the piece. This foundational understanding will guide your choices in materials and techniques, ensuring you approach the task with the necessary caution and respect for the artwork's longevity. For valuable or antique pieces, understanding these risks often leads to the decision to seek expert advice, as the potential for damage far outweighs the benefits of a DIY attempt. However, for less valuable or contemporary pieces, a careful and informed home cleaning can yield impressive results, restoring much of the painting's original vibrancy. Learning how to care for your art collection extends beyond just cleaning, encompassing proper display and storage to minimize future damage.

Essential Preparations and Tools for Safe Cleaning
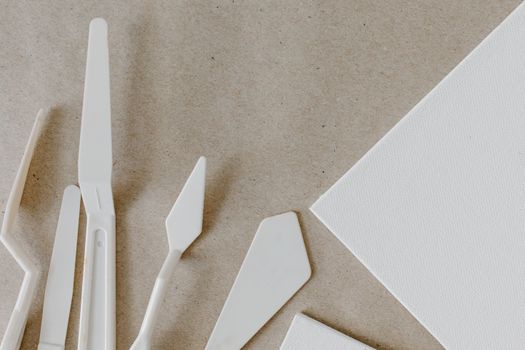
Close-up of plastic palette knives and canvas on a brown background. Photo: Tara Winstead / Pexels
Before you even consider touching your oil painting with a cleaning agent, thorough preparation is non-negotiable. This stage is critical for minimizing risks and ensuring the cleaning process is as safe and effective as possible. Start by choosing a clean, well-lit, and stable workspace. A large table covered with a soft, clean sheet or blanket provides a secure surface for the painting. Ensure the area is free from distractions and potential hazards. The first physical step is a gentle dry dusting. This removes loose surface dust and debris that could become abrasive when wet. Use a very soft, natural-bristle brush, such as a camel hair brush or a large, soft cosmetic brush. Brush lightly in one direction, always away from the painting, and never press down. Alternatively, a soft, lint-free cloth or a microfiber cloth can be used with extremely light, sweeping motions. For more stubborn dust or debris trapped in textured areas, a low-suction handheld vacuum cleaner with a brush attachment can be used, but keep it a few inches away from the surface to avoid direct contact and potential suction damage. Always prioritize gentleness. Once the loose dust is removed, gather your cleaning supplies. The absolute essentials include distilled water, which is free of minerals and impurities that tap water can contain and leave behind. You'll also need a supply of clean, soft cotton swabs (Q-tips) and lint-free cloths. Avoid colored cloths, as their dyes could transfer to the painting. For more significant grime, a mild, pH-neutral detergent or artist's cleaning solution specifically designed for oil paintings might be necessary. However, exercise extreme caution with any chemical solution. Products like saliva (yes, saliva!) have been historically used by conservators due to their enzymatic properties, but this is best left to professionals or applied with careful research. Never use household cleaners, abrasive sponges, or paper towels. These can scratch the surface, strip varnish, or leave fibers behind. A small magnifying glass can be useful for inspecting details and assessing the painting's condition before and after cleaning. Finally, and perhaps most importantly, always perform a patch test. Select an inconspicuous area of the painting – often a dark corner, an edge that will be covered by the frame, or a part of the signature if it's on a dark background. Apply your chosen cleaning method to this small spot and observe it for several minutes, or even hours, for any adverse reactions like color lift, dulling, or surface changes. This step is non-negotiable and provides invaluable insight into how the painting will react to your cleaning efforts. If any negative changes occur, cease immediately and consider professional restoration. Proper preparation is the foundation of successful and safe oil painting cleaning at home, safeguarding your artwork from accidental damage.

Step-by-Step Guide: Safely Cleaning Your Oil Painting
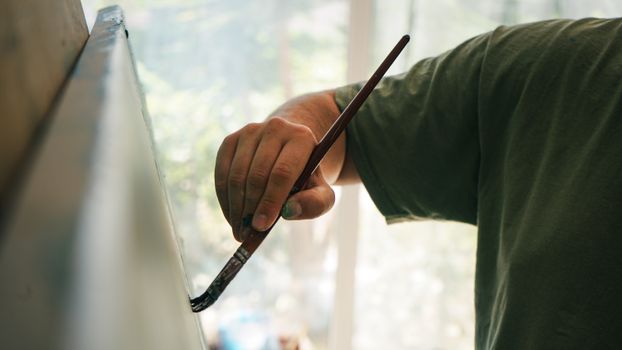
Close-up of an artist painting on a canvas indoors. Creative and calm atmosphere in the studio. Photo: Sabina Kallari / Pexels
Once you've meticulously prepared your workspace and gathered your gentle tools, it's time to embark on the actual cleaning process. Remember, patience and a light hand are your best allies. This step-by-step guide on how to clean oil paintings at home emphasizes caution and methodical application. **Step 1: Initial Dry Dusting (Revisited for Thoroughness)** Even if you've done a preliminary dusting, give the painting another very gentle pass with a soft, clean brush or microfiber cloth. Ensure all loose particles are removed. This prevents them from being dragged across the surface during wet cleaning, which could cause scratches. **Step 2: The Patch Test (Crucial for Safety)** As previously mentioned, this step cannot be overstressed. Dip a cotton swab into your chosen cleaning solution (distilled water, or a very diluted pH-neutral solution if needed). Roll, don't rub, the damp swab over a tiny, inconspicuous area, such as a dark edge or a part that will be covered by the frame. Observe carefully for any color transfer onto the swab, clouding of the varnish, or any other adverse reaction. If you see any paint coming off, even a slight discoloration on the swab, stop immediately. This indicates that the varnish or paint layers are too fragile for home cleaning, and professional conservation is necessary. If the varnish appears cloudy, the solution might be too strong or not suitable. Only proceed if the test area remains unchanged and the swab is clean. **Step 3: Gentle Surface Cleaning (Distilled Water First)** For general surface grime and light dirt, distilled water is often the safest and most effective initial approach. Dampen a clean cotton swab with distilled water, ensuring it's not dripping wet. Roll the swab gently over a small section of the painting, working in small, overlapping circular motions. Do not scrub or apply pressure. The goal is to lift the dirt, not push it around or into the paint layers. As the swab picks up dirt, you'll see it discolor. Immediately discard that swab and use a fresh, clean one. This is critical to avoid redepositing dirt. Continue working in small sections, replacing swabs frequently, until the entire surface has been gently cleaned with distilled water. Follow each damp pass with a dry cotton swab or a very soft, lint-free cloth to gently blot any excess moisture. Allowing water to sit on the surface can cause damage. **Step 4: Addressing More Stubborn Grime (If Necessary and Tested)** If distilled water alone isn't sufficient for certain areas, and you've successfully patch-tested a mild, pH-neutral artist's cleaning solution (never a household cleaner), you can proceed with extreme caution. Dilute the solution according to the manufacturer's instructions, or even more, to start. Repeat Step 3, using the diluted solution on clean cotton swabs, working in small sections, and replacing swabs constantly. After using the cleaning solution, immediately follow with a swab dampened with plain distilled water to rinse the area, and then a dry swab to blot. This ensures no residues from the cleaning solution are left on the painting. It's often better to clean an area multiple times with a very mild solution than once with a strong one. **Step 5: Drying and Inspection** Once the entire painting has been cleaned and gently blotted dry, allow it to air dry completely in a dust-free environment for several hours or even a day. Avoid direct sunlight or heat, which can cause cracking. After drying, inspect the painting thoroughly under good lighting. Look for any missed spots, streaks, or any signs of damage. You should notice a significant improvement in the vibrancy of the colors and clarity of details. Remember, the goal is not to make the painting look brand new, but to gently remove accumulated dirt and grime without compromising its integrity. For more advanced art restoration techniques, it's always best to consult a professional.

Advanced Considerations, Common Mistakes, and When to Call a Pro

Female artist deeply engaged in painting at her creative studio workspace. Photo: Andrea Piacquadio / Pexels
While learning how to clean oil paintings at home can be empowering for simple surface grime, there are advanced considerations and common pitfalls to be aware of. Not all paintings are suitable for DIY cleaning, and knowing your limits is crucial to prevent irreversible damage. **Advanced Considerations:** * **Varnish Layer:** A well-varnished painting is generally more robust for surface cleaning as the varnish acts as a protective barrier. However, if the varnish itself is discolored, cracked, or flaking, home cleaning can be detrimental. Removing aged, yellowed varnish is a complex process best left to professional conservators who understand the different types of varnish and their appropriate solvents. Attempting to remove varnish without expertise can easily strip away paint layers underneath. * **Unvarnished Paintings:** Some oil paintings, particularly older ones or those from certain artistic periods, may be unvarnished. These are extremely delicate, as there is no protective layer between the paint and the environment. Any wet cleaning on an unvarnished painting should be approached with extreme caution, often limited to very gentle dry dusting. Even distilled water can potentially interact directly with the paint pigments. * **Craquelure and Flaking Paint:** Paintings with extensive craquelure (fine cracks) or areas of flaking paint are highly vulnerable. Any moisture or pressure can cause further paint loss. These conditions require stabilization by a conservator before any cleaning, even dusting, is attempted. * **Lining and Support:** The condition of the canvas or panel itself is important. If the support is brittle, torn, or sagging, it needs professional attention. Cleaning a painting with an unstable support can exacerbate existing structural problems. **Common Mistakes to Avoid:** * **Using Harsh Chemicals:** Never use household cleaners, window cleaner, ammonia, alcohol, or any solvent not specifically formulated and tested for art conservation. These can dissolve paint, remove varnish, or cause irreversible chemical reactions. * **Scrubbing or Applying Pressure:** Oil paint layers are delicate. Scrubbing can abrade the paint, remove glazes, or push dirt deeper into the surface. * **Using Dirty Swabs/Cloths:** Reusing a dirty swab redeposits grime and can spread contaminants. Always use fresh, clean materials. * **Oversaturating the Surface:** Too much moisture can penetrate cracks, swell the canvas, or cause paint layers to lift. Swabs should be damp, not wet. * **Ignoring the Patch Test:** Skipping this vital step is a gamble with your artwork's integrity. * **Trying to Fix Everything:** Home cleaning is for surface grime. It's not for repairing cracks, removing deep stains, or restoring lost paint. Attempting these can cause catastrophic damage. **When to Call a Professional Conservator:** It's paramount to recognize when a painting requires professional intervention. Always consult a conservator if: * The painting is valuable, antique, or holds significant sentimental worth. * You observe any flaking, lifting, or unstable paint. * The varnish is significantly yellowed, discolored, or appears cloudy/cracked. * There are deep stains, mold, or mildew growth. * The canvas is torn, punctured, or severely warped. * Your patch test reveals any adverse reaction, no matter how minor. * You are unsure about any aspect of the cleaning process. Professional conservators have specialized knowledge, equipment, and materials to safely clean, restore, and preserve artworks without causing harm. They can identify the specific materials used by the artist, the age of the varnish, and the best approach for conservation. While home cleaning can be effective for routine maintenance, knowing when to defer to an expert is the mark of a responsible art owner. Investing in professional care for cherished pieces ensures their longevity for generations to come. **List of things to avoid:** * Household cleaning sprays * Paper towels or abrasive cloths * Rubbing alcohol or acetone * Strong detergents or solvents * Saturating the canvas with liquids * Applying excessive pressure * Direct sunlight during drying * Ignoring signs of paint damage

Comparison

FeatureGentle Dry DustingDistilled Water CleaningMild pH-Neutral SolutionProfessional Restoration
Suitable forLoose dust, light debrisSurface grime, light dirtModerate grime, stubborn dirtAll issues, varnish removal, repairs
Risk LevelVery LowLow (with patch test)Moderate (with patch test)Very Low (when certified)
Required SkillBeginnerIntermediateAdvanced DIYExpert
CostMinimal (brushes)Low (swabs, water)Medium (specialized cleaner)High
Varnish Safe✓ (if tested)
Paint Layer ImpactNoneNone (if careful)Minimal (if careful)Restorative

What Readers Say

"I was so nervous to clean my grandmother's old oil painting, but this guide on how to clean oil paintings at home was incredibly thorough. The distilled water and cotton swab method worked wonders, bringing out colors I hadn't seen in years. The patch test advice saved me from potential disaster on a more fragile area."

Sarah J. · Austin, TX

"After reading this article, I felt confident enough to tackle a dusty landscape painting. The emphasis on gentle dry dusting first, then using fresh swabs with distilled water, made all the difference. My painting looks so much brighter now, and I didn't cause any damage."

Mark D. · Seattle, WA

"My antique oil portrait had a dull, smoky film. Following the detailed steps, especially the section on pH-neutral solutions for stubborn grime, helped me restore its vibrancy. The transformation was remarkable, revealing details I thought were lost forever."

Emily R. · Boston, MA

"This guide offered solid advice for cleaning my modern oil painting. While I still have a few tricky spots, the clear instructions on what to use and what to avoid prevented me from making costly mistakes. I appreciated the emphasis on professional help for more serious issues."

David K. · Denver, CO

"I used these techniques on a large, contemporary abstract oil painting that had accumulated years of dust. The results were fantastic! The colors popped again, and the surface looks much cleaner. The advice to work in small sections was key."

Linda P. · Miami, FL

Frequently Asked Questions

What is the safest way to clean a dusty oil painting at home?

The safest initial step is a gentle dry dusting using a very soft, natural-bristle brush or a clean, lint-free microfiber cloth. Use light, sweeping motions and avoid any pressure. For slightly more ingrained dust, a cotton swab lightly dampened with distilled water, applied with a rolling motion in small sections, is often effective after a successful patch test.

Can I use household cleaners like Windex or soap and water on an oil painting?

Absolutely not. Household cleaners, including Windex, dish soap, or all-purpose cleaners, contain harsh chemicals, ammonia, or detergents that can severely damage oil paint, dissolve varnish, cause discoloration, or leave irreversible residues. Always stick to distilled water or specialized, pH-neutral art cleaning solutions after a thorough patch test.

How often should I clean my oil paintings?

Routine dry dusting should be done every few months or as needed to prevent significant dust buildup. A more thorough wet cleaning with distilled water should only be performed every few years, or when visible grime starts to dull the painting. Over-cleaning can be as damaging as neglect, so always assess the need before cleaning.

Is it expensive to get an oil painting professionally cleaned?

The cost of professional oil painting cleaning and restoration can vary widely, typically ranging from a few hundred to several thousand dollars, depending on the painting's size, condition, and the complexity of the work required (e.g., surface cleaning vs. varnish removal and structural repair). While it's an investment, it's often essential for valuable or severely damaged pieces to preserve their integrity and value.

What's the difference between cleaning and restoring an oil painting?

Cleaning primarily involves removing surface dirt, grime, and sometimes discolored varnish to reveal the original colors. Restoration, on the other hand, is a more extensive process that can include cleaning, repairing tears, consolidating flaking paint, filling losses, inpainting (retouching damaged areas), and revarnishing. Cleaning is a component of restoration, but restoration goes much further in repairing structural and aesthetic damage.

Who should attempt to clean an oil painting at home?

Home cleaning of oil paintings should only be attempted by individuals who are patient, meticulous, and willing to follow instructions precisely, especially regarding patch testing and using only gentle, appropriate materials. It's best suited for paintings with general surface dust and light grime, not for valuable antiques, artworks with flaking paint, or those requiring deep restoration.

Are there any risks involved with cleaning oil paintings myself?

Yes, significant risks exist. Improper cleaning can lead to irreversible damage such as paint loss, color fading, alteration of the original finish, scratching, or chemical reactions that can degrade the artwork. The biggest risks come from using harsh chemicals, applying too much pressure, or neglecting to perform a patch test. When in doubt, always consult a professional conservator.

What are the future trends in oil painting conservation?

Future trends in oil painting conservation focus on less invasive techniques, the development of new, more stable and reversible conservation materials, and advanced analytical methods to understand artwork composition without destructive sampling. There's also a growing emphasis on preventive conservation, controlling environmental factors like humidity and light to slow degradation, and using digital imaging for documentation and virtual restoration.

Mastering how to clean oil paintings at home ensures your cherished artworks retain their beauty and value for years to come. By following these careful, step-by-step instructions and understanding when to seek professional help, you can confidently preserve your collection. Take the first step today to protect your artistic treasures.

Topics: how to clean oil paintings at homerestoring old oil paintingsoil painting cleaning suppliessafe oil painting cleaning methodsdusting oil paintings
Leo List
Brampton weed
Adultwork EstrelaBet Vai de Bet R7 Bet Betão Galera Bet Rainbet Bet9ja Shop SportyBet BetKing Sisal Loto Foot Hollywoodbets YesPlay Odibets RushBet Jugabet BetWarrior BetCity MSport betPawa Fortebet